Efficient and Precise: How to Cut Formica Using an Oscillating Tool
Introduction
Formica, a well-known brand of laminate material, has been widely used in various industries and applications due to its durability, versatility, and aesthetic appeal.
Whether you are a professional craftsman or a DIY enthusiast, understanding the most efficient and precise method of cutting Formica is crucial in achieving the desired results without compromising the integrity of the material. This comprehensive guide will explore the art of cutting Formica using an oscillating tool—a versatile and practical option.
To embark on this journey of precision and efficiency, it is essential to first familiarize ourselves with what Formica truly is. Formica belongs to the laminate family, consisting of layers of paper impregnated with melamine resin bonded together under high pressure and temperature.
This process creates a robust material that exhibits excellent resistance against abrasion, impact, moisture, and heat. Moreover, Formica is available in an extensive range of colours, patterns, textures, and finishes—allowing for endless design possibilities in applications such as countertops, furniture surfaces, cabinetry panels, and flooring overlays.
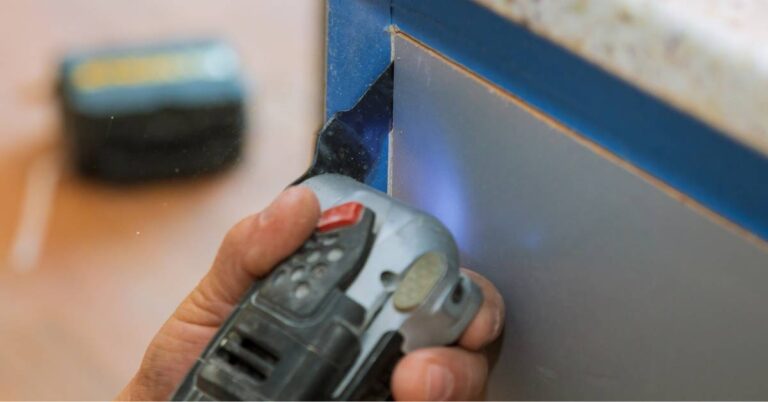
Before delving into the intricacies of cutting Formica with an oscillating tool specifically designed for such tasks, it is paramount to emphasize the importance of selecting the appropriate tool. An oscillating tool—a multi-tool—derives its name from its characteristic back-and-forth motion at high frequencies.
With interchangeable blades that can perform various functions, such as cutting through different materials like wood or metal or sanding surfaces smoothly, an oscillating tool offers unparalleled precision, making it ideal for working with delicate materials like Formica. Cutting Formica requires finesse and accuracy to achieve clean edges without damaging the material itself.
You can ensure the desired results by utilizing an oscillating tool designed explicitly for this purpose, along with careful consideration given to blade selection based on the type and thickness of your chosen Formica sheet. In the following sections, we will delve deeper into the process of cutting Formica using an oscillating tool, including safety precautions, measuring and marking techniques, step-by-step cutting instructions, addressing challenging cuts and edges, post-cutting finishing and clean-up, as well as guidance on maintaining your oscillating tool for long-lasting performance.
Understanding Formica as a Material
Understanding Formica as a Material Formica is a versatile laminate material commonly used for countertops, cabinets, and furniture surfaces.
It consists of multiple layers of kraft paper impregnated with phenolic resin, which are then bonded together under high heat and pressure. The top layer is composed of melamine resin that provides the desired aesthetic appeal, while the lower layers contribute to the material’s durability and strength.
One of Formica’s critical characteristics is its exceptional resistance to heat, moisture, and staining. This makes it an ideal choice for kitchen countertops where regular food preparation and cooking occur.
However, while Formica can withstand high temperatures, direct contact with hot pans or pots should be avoided, as this can cause damage over time. Another advantage of Formica as a material is its ease of maintenance.
Unlike natural stone or wood surfaces that may require regular sealing or conditioning, Formica requires regular wiping with a damp cloth and mild detergent to keep it clean. Additionally, Formica doesn’t harbor bacteria or mold growth like some other materials do due to its non-porous nature.
Formica also offers various design options and patterns to suit different interior styles. Whether you prefer a sleek contemporary look or a more traditional aesthetic, the market offers a wide range of colors and finishes.
Formica allows homeowners to achieve their desired look without breaking the bank. Its solid colors and textured patterns mimic natural materials such as granite or wood grain. Understanding the characteristics of Formica is crucial before attempting any cutting or installation tasks involving this material.
Its resilience against heat and moisture makes it an excellent choice for areas prone to spills and stains, like kitchens or bathrooms. Its low maintenance requirements and its design versatility make it an appealing option for many homeowners looking for both functionality and aesthetics in their living spaces.
Choosing the Right Oscillating Tool and Blade for Formica
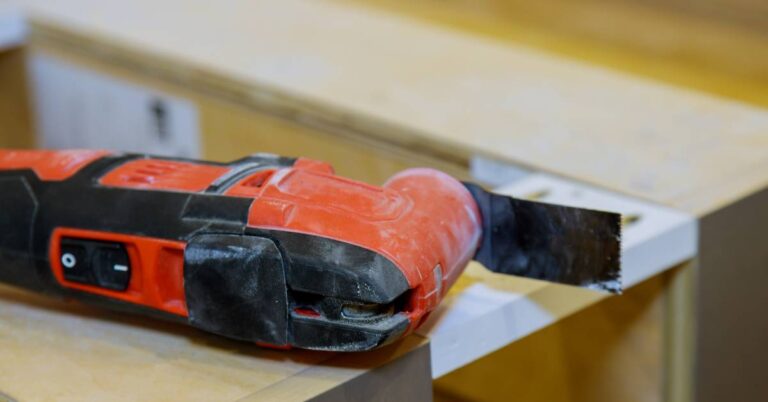
When cutting Formica, selecting the right oscillating tool and blade is crucial for achieving efficient and precise results. The tool you choose should be designed explicitly for woodworking tasks, as they typically offer the power and control required for cutting laminates such as Formica.
Investing in a high-quality blade well-suited for cutting this material will ensure clean and smooth edges. One critical factor to consider when choosing an oscillating tool for cutting Formica is its power output.
Opting for a tool with ample power will allow you to effortlessly cut through the laminate without putting too much strain on the machine or yourself. Look for a model that offers at least 3-4 amps of power, providing enough strength to tackle thicker sheets of Formica effectively.
Aside from power, it’s essential to consider the speed settings available on an oscillating tool. Variable speed options allow you to adjust the cutting speed according to your specific needs and preferences.
For example, lower speeds can be helpful when making intricate cuts or working with delicate edges, while higher speeds are more suitable for quick, straight-line cuts. Various types of blades are available that are specifically designed for cutting laminates like Formica.
Look for blades labelled as “fine-tooth” or “carbide-tipped,” as these tend to deliver cleaner cuts with less chipping or splintering along the edges. Additionally, consider using blades with smaller teeth per inch (TPI), such as 18-24 TPI, as they provide finer cuts with greater precision.
You can ensure optimal performance during your cutting tasks by carefully selecting an appropriate oscillating tool with sufficient power and adjustable speed settings and utilizing a high-quality blade explicitly designed for laminate materials like Formica. This thoughtful selection process will ultimately contribute to achieving efficient and precise results while minimizing any potential damage or imperfections to the Formica surface.
Safety Precautions Before Cutting
Before diving into the cutting process, it is essential to prioritize safety precautions to ensure a smooth and accident-free experience. Cutting Formica can present certain risks if proper measures are not taken.
Following these guidelines can reduce the likelihood of accidents and protect yourself from potential harm. First and foremost, wearing appropriate personal protective equipment (PPE) is crucial.
Start by wearing safety goggles to shield your eyes from any flying debris or dust particles generated during the cutting process. Additionally, donning sturdy work gloves will provide an excellent grip on the oscillating tool while shielding your hands from sharp edges or accidental slips.
Working in a well-ventilated area is another safety consideration. When cutting Formica, fine dust particles can be released into the air, which may be harmful if inhaled over an extended period.
Therefore, working in a space with adequate ventilation or using additional ventilation equipment such as fans or extraction systems is recommended to keep the air clean and free from excessive dust buildup. Furthermore, before starting any project involving Formica cutting with an oscillating tool, inspect your tools for potential damage or defects that could compromise their performance or pose hazards during use.
Check that the power cord or battery pack is intact without any fraying wires or visible damage. Ensure all switches and controls on the tool function correctly and that blades are securely attached without any signs of wear or dullness.
Any damaged tools should be repaired or replaced before attempting to cut Formica. Prioritizing safety precautions before cutting Formica using an oscillating tool is crucial for minimizing accidents and ensuring a secure working environment.
Wearing appropriate personal protective equipment, such as safety goggles and work gloves, will protect you from potential harm caused by debris and sharp edges. Additionally, working in a well-ventilated area with proper airflow will help reduce the inhalation of harmful dust particles.
Inspecting and ensuring the tool’s integrity before use is vital to prevent equipment malfunctions or accidents during cutting. By adhering to these safety guidelines, you can confidently proceed with cutting Formica efficiently and precisely.
Preparing to Cut: Measuring and Marking
Preparing to Cut: Measuring and Marking Before diving into the cutting process, it is crucial to adequately prepare the Formica surface by carefully measuring and marking the areas that require cutting.
This step ensures precision and minimizes the risk of errors or uneven cuts. Follow these steps for accurate measurement and marking:
1. Begin by taking precise measurements of the Formica sheet or panel using a tape measure. Measure the length and width, ensuring you account for any specific dimensions required for your project.
It is advisable to measure multiple times to ensure accuracy. 2. Once you have obtained the measurements, mark them directly on the surface of your Formica using a pencil or a fine-tip marker.
To avoid any potential damage, make sure to use a soft lead pencil or a marker specifically designed for marking on laminates like Formica. 3. When marking your measurements on curved edges or irregular shapes, consider using a flexible contour gauge tool to capture accurate outlines of those areas onto a separate piece of paper or cardboard template.
This will help you transfer precise markings onto the Formica sheet later. 4. For straight cuts, use a straightedge (such as a ruler or level) positioned along your marked line to create a memorable guide that will guide your oscillating tool during cutting.
It is essential to ensure your guide is securely placed before cutting. 5. Additionally, if you need to cut curves or irregular shapes in the Formica sheet, consider creating templates from thin plywood or cardboard based on your desired design specifications beforehand.
These templates can then be placed and traced onto the Formica surface as guides for more intricate cuts. Taking time and care during measurement and marking will lay a solid foundation for an efficient and accurate cutting process with an oscillating tool when working with Formica materials.
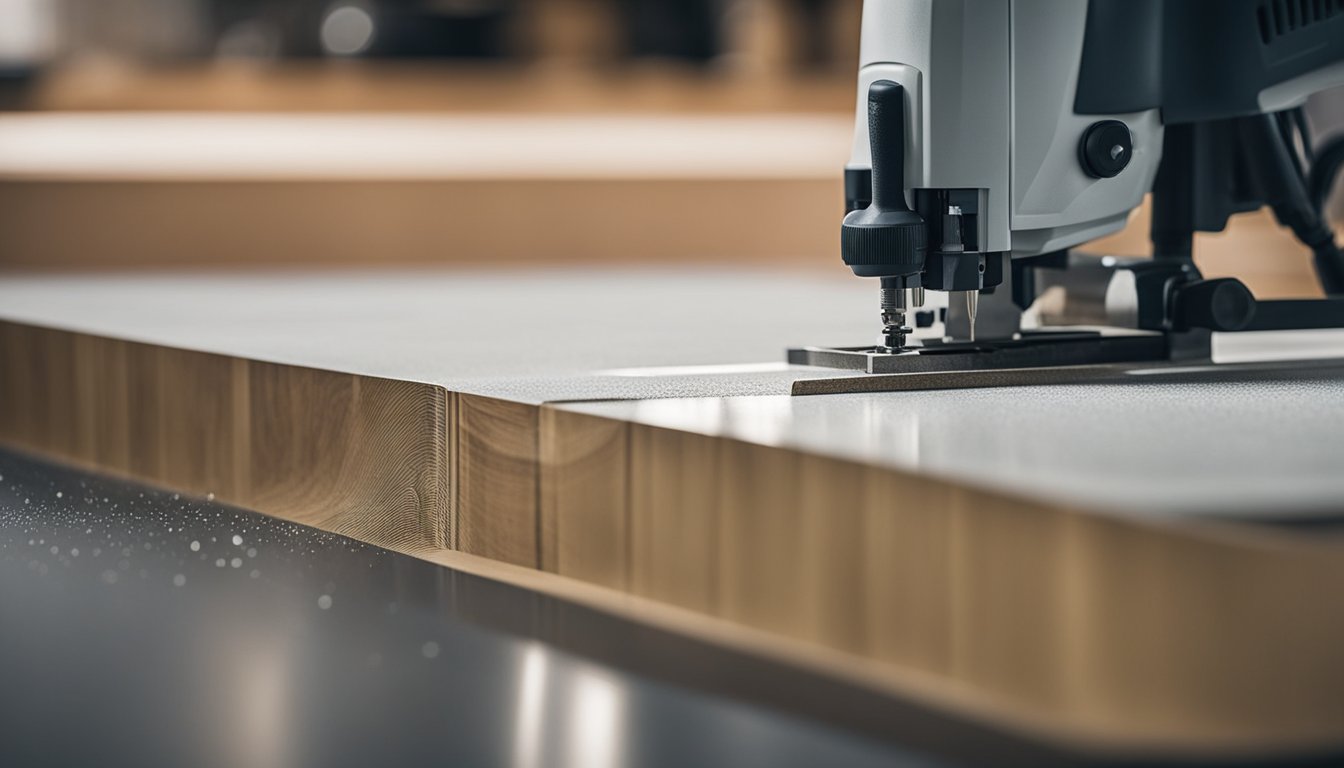
The Cutting Process: Detailed Steps
The Cutting Process: Detailed Steps Once you have prepared and marked your Formica sheet, it’s time to delve into the cutting process itself.
This section will guide you through each detailed step, ensuring that you achieve precise and efficient cuts with your oscillating tool. 1. Begin by securing the Formica sheet firmly onto a stable work surface.
This will prevent unnecessary movement during cutting, ensuring clean and accurate cuts. Consider using clamps or a sturdy workbench to keep the material in place.
2. Before starting the tool, wear appropriate safety gear, including safety goggles and gloves. Safety should always be a priority when working with power tools.
Once adequately equipped, switch on your oscillating tool and allow it to reach its full speed before making any contact with the Formica. 3. Approach the material with steady hands and position the oscillating tool at a slight angle to create an entry point for the blade.
Apply gentle pressure as you guide the tool along your marked line or pattern, making smooth and controlled movements. Remember that excessive force can lead to chipping or splintering the Formica surface.
4. As you progress along your cut, maintain a consistent pace while controlling both speed and pressure applied to ensure an even cut throughout. Patience is vital; rushing through this process may result in uneven edges or mistakes that require additional repairs later.
5. For curved cuts or intricate designs, maneuvering becomes crucially important. Slow down slightly while gradually turning or pivoting the oscillating tool to follow your desired curve accurately.
Take extra care to stay within your intended path; precision is essential for smooth curves without jagged edges. 6. Ensure that your hand remains steady throughout each cut by using both hands if necessary – one hand gripping onto the oscillating tool firmly while guiding while using another hand gently to support and stabilize your cut.
Maintaining a balanced grip will enhance control, reducing the chances of slips or inaccurate cuts. Following these detailed steps, you can confidently navigate the cutting process and achieve precise results while using an oscillating tool with Formica.
Practice patience, maintain a steady hand, and apply even pressure throughout each cut to ensure clean edges and accurate shapes. With practice, you’ll be able to take on more complex designs and achieve professional-looking results quickly.
Managing Challenging Cuts and Edges
Managing Challenging Cuts and Edges When working with Formica, you may encounter challenging cuts and edges that require special attention.
These situations can arise when cutting curves, making intricate designs, or dealing with uneven surfaces. Following a few fundamental guidelines is essential to handle these scenarios with precision and efficiency.
1. Cutting Curves: Cutting curves in Formica can be tricky, but an oscillating tool equipped with the right blade can make it much more manageable.
Start by marking the desired curve on the Formica surface using a pencil or marker. Next, carefully position the oscillating tool at one end of the curve and initiate the cut slowly and steadily.
As you move along the marked line, ensure that the blade remains perpendicular to the surface and apply gentle pressure to guide it along the curve smoothly. Make slight adjustments as needed to maintain accuracy throughout.
Remember, patience is crucial in achieving clean and precise curved cuts. 2. Intricate Designs:
Creating intricate designs on Formica requires meticulous attention to detail and skill. Before attempting such cuts, sketch out your design lightly on the surface of the Formica using a pencil or marker as a guide.
Consider breaking them down into smaller sections for complex patterns or shapes involving multiple cuts for better control. Begin cutting from an outer edge towards the interior of your design while keeping a steady hand and applying gentle pressure on the oscillating tool.
Take your time during this process to prevent any mistakes or slips that could compromise your design’s integrity. 3. Uneven Surfaces:
When encountering uneven surfaces while cutting Formica, it becomes imperative to adjust accordingly for accurate results without damaging the material or your oscillating tool’s blade. Before making any cuts, visually identify areas with noticeable variations in thickness or unevenness on the surface of your workpiece or by gently running your hand over it.
When cutting through such areas, maintain a firm grip on the oscillating tool and proceed cautiously. Use consistent pressure and slow, deliberate movements to ensure the blade retains contact with the surface throughout the cut.
If necessary, make multiple passes over uneven sections to achieve a clean and even edge. By following these guidelines for managing challenging cuts and edges when working with Formica, you can overcome any obstacles during your project.
Remember to prioritize precision over speed, take breaks if necessary to maintain focus, and never compromise safety measures while operating your oscillating tool. With practice and patience, you will master these techniques and achieve exceptional results in your Formica cutting endeavours.
Post-Cutting: Finishing and Clean-Up
After successfully cutting Formica using an oscillating tool, focusing on the post-cutting process is essential. This involves finishing the cut edges and ensuring your project’s clean and polished look.
Additionally, proper clean-up is crucial to maintain the cleanliness and functionality of your work area. In this section, we will discuss the various techniques and steps involved in post-cutting finishing and clean-up.
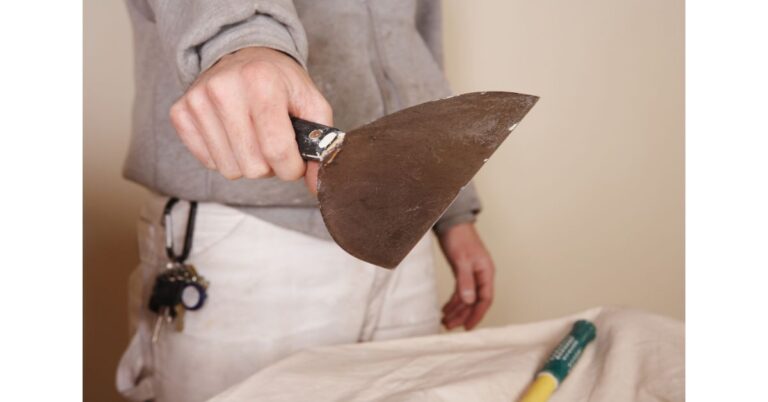
To begin with, it is essential to examine the cut edges of your Formica carefully. If any rough or jagged edges are visible, they can be smoothed out using fine-grit sandpaper.
Gently rub the sandpaper along the edge in a back-and-forth motion until it feels smooth to the touch. For best results, use sandpaper with a grit level of 220 or higher.
Do not apply excessive pressure, which may damage or chip the Formica. Once you have smoothed out rough edges, you can enhance the appearance using a laminate trimmer or router with a chamfer bit along the cut edge.
This technique creates a slightly bevelled edge that adds aesthetic appeal and helps prevent any potential peeling or chipping over time. For consistent results, you hold the trimmer or router steadily and move it smoothly along the edge.
After addressing the cut edges, it’s time to focus on cleaning up your work area from any debris generated during cutting. Start by removing extensive waste material around your workspace and dispose of them properly.
Use a vacuum cleaner with a brush attachment or damp cloth to remove smaller particles from your work area surface and tools. Pay attention to visible areas and hard-to-reach corners where dust tends to accumulate.
In addition, inspect your oscillating tool thoroughly after use and remove any residual dust or debris that may have accumulated during cutting. Wipe down its exterior surfaces with a lightly dampened cloth, taking care not to get water near the motor or any electrical components.
If necessary, refer to the manufacturer’s instructions on properly cleaning and maintaining your specific oscillating tool model. By following these post-cutting finishing and clean-up steps, you can ensure that your Formica project looks professional and well-polished and maintains a clean and organized work environment for future endeavors.
Maintaining Your Oscillating Tool After Use
After completing your Formica cutting project, it is essential to maintain your oscillating tool properly to ensure its longevity and optimal performance. Regular maintenance not only extends the lifespan of your tool but also ensures that it is always ready for future projects.
This section will discuss three crucial steps for maintaining your oscillating tool after use. The first step is cleaning it thoroughly.
Formica cutting can leave adhesive residue and wood particles on the blade and the tool’s body. Start by unplugging the device or removing its battery to prevent any accidents.
Next, gently remove any debris from the blade using a soft brush or a toothbrush, making sure to reach all crevices and teeth. Cleanse the tool’s body with a damp cloth and mild soap solution, ensuring you do not saturate any electrical components.
Dry all parts thoroughly before reassembling. Once you have completed cleaning your oscillating tool, it’s essential to inspect all components for wear and tear.
Please pay close attention to the blade’s condition, as repeated use on Formica can dull its edges over time. It may be time for a replacement if you notice excessive wear or chipping on the blade teeth.
Additionally, examine other parts, such as bolts, levers, and switches, for any signs of damage or looseness. Tighten loose screws or fasteners using an appropriate screwdriver or wrench to ensure optimum stability during future tasks.
Lubrication plays a vital role in maintaining an oscillating tool’s performance. As recommended by its manufacturer, apply a few drops of lubricant-like machine oil to moving parts such as pivot points and joints within the mechanism of your oscillating tool.
This helps reduce friction during operation, preventing overheating and delaying wear-and-tear effects caused by constant use. Regularly following these three steps – cleaning thoroughly after each use, inspecting for any damages, and lubricating moving parts – you can maintain your oscillating tool in top-notch condition.
Remember that your tool’s longevity and performance directly depend on your care and attention. Taking these measures ensures that your future Formica cutting tasks are efficient and precise and guarantees a longer lifespan for your oscillating tool, ultimately providing you with great value for your investment.
Conclusion
Mastering the art of cutting Formica using an oscillating tool can significantly enhance your woodworking skills and efficiency. You can consistently achieve precise and clean cuts by understanding the material properties and following the recommended safety precautions. The right choice of oscillating tool and blade for Formica is crucial, ensuring smooth operations and minimizing potential damage to the material.
Throughout this article, we have explored various aspects of cutting Formica with an oscillating tool. We discussed the importance of measuring and marking accurately to achieve the desired results.
Additionally, we delved into the step-by-step cutting process, providing detailed instructions to guide you through each stage. We also addressed managing challenging cuts and edges effectively to overcome potential hurdles.
After completing your cutting tasks successfully, remember post-cutting procedures such as finishing touches and clean-up. These final steps should be noticed as they contribute significantly to achieving a professional-looking result.
Remember to properly maintain your oscillating tool after use by cleaning it thoroughly and keeping blades sharp or sanding pads for optimal performance in future projects. Mastering the skill of cutting Formica using an oscillating tool can open up a world of creative possibilities for your woodworking endeavours.
Embrace this technique confidently as you create beautiful countertops, cabinets, or other wood-based projects with precision and efficiency. Remember that practice makes perfect; with time and experience under your belt, you will become a master at handling Formica while enjoying the satisfaction that comes from crafting high-quality pieces that stand out from the crowd.