Mastering Drywall Finishing: Top Tools for a Perfect Result
When taking on a drywall finishing project, achieving a flawless finish is the ultimate goal. A smooth, seamless surface looks professional and provides the perfect canvas for painting and decorating. To master the art of drywall finishing, having the right tools in our arsenal is essential. This article discusses the fundamental tools needed for a successful drywall finishing job, ensuring our results are visually appealing and long-lasting.
Before diving into finishing drywall, it’s essential to understand the core steps involved. These include taping, mudding, and sanding – each requiring specific tools to execute correctly. To achieve the desired outcome, we must be proficient in each step and confident in utilizing the essential tools effectively.
Selecting high-quality tools and mastering their use significantly impacts the quality of our drywall finishing job. With the right equipment and techniques, we can transform any space into a beautiful, professionally-finished room ready for paint or other decorative elements.
Essential Tools for Drywall Finishing
When it comes to finishing drywall, having the right tools in our arsenal is crucial for achieving that flawless finish. This section discusses the essential tools to make our drywall finishing tasks more accessible and efficient.
Joint Compound
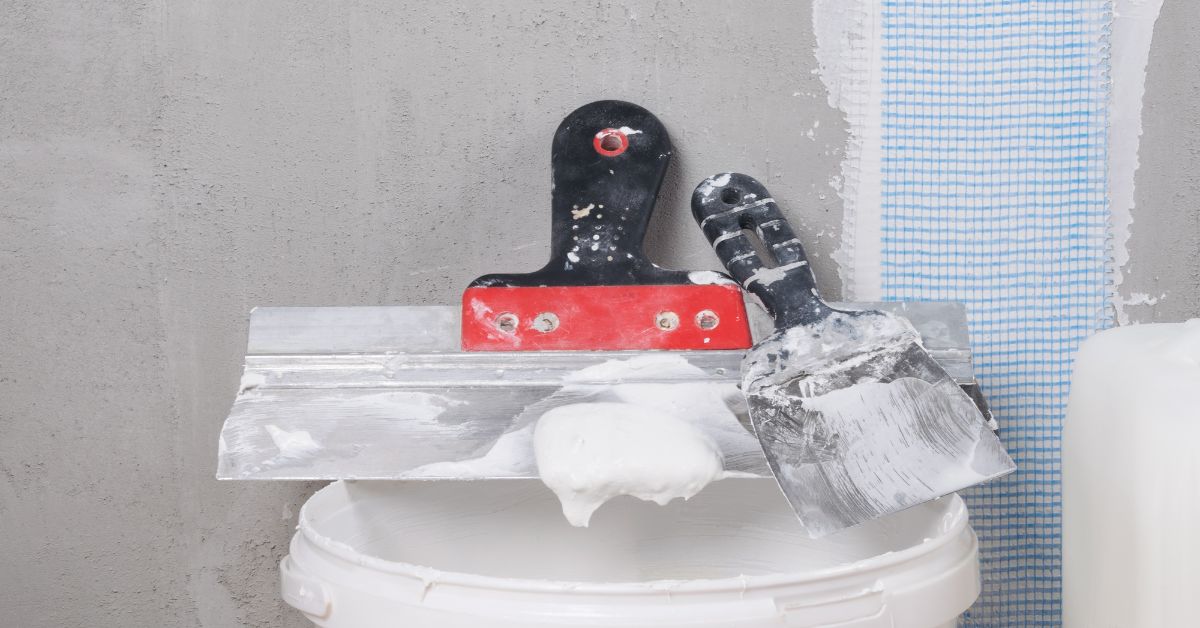
First and foremost, we’ll need a good quality joint compound. Joint compounds are used to fill in the gaps between drywall panels and create smooth, seamless surfaces. There are various types of joint compounds available in the market, such as:
- All-purpose compound: Suitable for taping and finishing, it dries relatively slowly to provide more working time.
- Topping compound: It is ideal for final coat applications, is easy to sand, and offers a smooth finish.
- Setting-type compound: This compound hardens quickly, making it perfect for patches and repairs.
Taping Tools
Next, let’s talk about the taping tools we’ll need for smooth, even application of joint compound and securing the drywall tape. Some of the essential taping tools include:
- Drywall knives: These come in various sizes (typically 4″, 6″, and 12″) and are used for applying joint compound and spreading it evenly.
- Utility knife: A sharp utility knife is essential for cutting drywall tape and fibreglass mesh and trimming excess material.
- Taping knife: A broader, flexible blade taping knife helps feather joint compounds and apply joint tape.
- Fasteners: Drywall screws and drywall nails are used for securing the drywall panels to the framing.
Sanding Tools
Finally, achieving a smooth finish demands the right sanding tools. Choosing the right sanding tools will help us reduce the amount of dust and create an even surface for painting. Here are some essential sanding tools:
- Sanding sponge: A versatile and reusable option for sanding tight corners and small areas, it can be rinsed and reused.
- Sanding block: A hand-held tool with a flat surface for attaching sanding sheets; it provides even pressure for smoother results.
- Pole sander: A pole-mounted sanding head that allows us to sand high walls and ceilings without a ladder or scaffold.
- Sanding sheets: These come in various grits, typically 100-150 grit for initial sanding and 180-220 grit for finished sanding.
Remember to wear a dust mask while sanding to protect yourself from inhaling fine dust particles.
By equipping ourselves with these essential tools for drywall finishing, we’ll be well on our way to achieving a professional-quality, flawless finish.
Preparing the Workspace
Clearing and Cleaning the Room
Before starting our drywall finishing project, preparing the workspace by clearing and cleaning the room is essential. We should remove all furniture, wall decorations, and items obstructing our work area. In the case of a home improvement project, we might need to relocate these belongings to another room or storage area temporarily.
Once we’ve cleared the room, we should thoroughly clean the floors and walls to ensure a dust-free environment, as dust can affect the adhesion and finish of the drywall compound. Vacuuming and wiping down surfaces should do the trick. Remember to cover electrical boxes with plastic or tape to keep them clean and safe.
Setting Up Safety Measures
Safety is crucial when working on any home improvement project; drywall finishing is no exception. Here are some critical safety measures we should implement:
- Ventilation: Ensure proper ventilation to minimize dust inhalation and keep fresh air circulating. Set up a fan or open windows as necessary.
- Dust Mask: We wear a dust mask to protect our lungs from inhaling fine drywall particles that can be harmful over time.
- Safety Glasses: Protect our eyes from dust and debris by wearing safety glasses.
- Protective Clothing: Wear suitable clothing that covers exposed skin, as the drywall compound can be irritating, and some materials can cause minor skin reactions.
By following these safety measures and adequately preparing our workspace, we can ensure a smooth and successful drywall finishing project.
Prepping and Installing Drywall
When mastering drywall finishing, proper preparation and installation are essential. This section will cover the basics of securing drywall sheets and cutting and fitting drywall around obstructions.
Securing Drywall Sheets
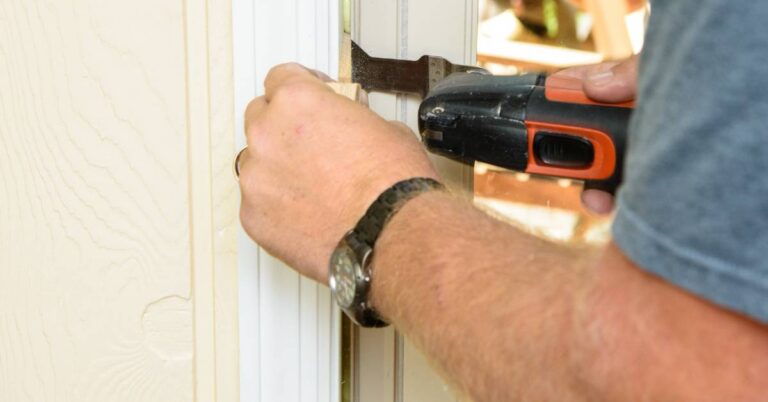
First, we need to measure and cut the new drywall to fit our working space. We recommend using a drywall T-square for accurate measurements and straight cuts. Once the drywall is cut, we will attach it to the wall framing using screws or nails, depending on the materials and preference.
When securing the drywall sheets, make sure to:
- Space the screws or nails approximately 12 inches apart.
- Keep the fasteners at least 3/8 inches from the edges to prevent breakage.
- Embed the screws to be slightly below the surface without tearing the paper.
Cutting and Fitting Drywall Around Obstructions
Sometimes, we will encounter obstructions in the wall, such as electrical outlets, switches, or vents. Cutting and fitting drywall around these obstructions can be done by following these steps:
- Measure and mark the location of the obstruction on the new drywall. Use a tape measure and a pencil to accurately measure the obstruction’s position relative to the edges of the new drywall sheet.
- Score the marked area with a utility knife. Lightly score the lines on the drywall, using the drywall T-square to ensure the lines are straight.
- Cut through the scored lines with a jab saw. A jab saw is a handy tool for cutting irregular shapes and making precise cuts in drywall. Start at one corner of the scored lines and carefully cut along the lines with the jab saw to remove the unwanted piece.
- Confirm the fit and install the new drywall. Once the cut has been made, place the new drywall against the obstruction and confirm that the fit is accurate before proceeding with the installation process.
Remember that mastering drywall finishing starts with proper preparation and installation. We can achieve a flawless and professional-looking finish in our projects by carefully measuring, cutting, and securing drywall sheets.
Taping and Bedding Drywall Seams
Applying Joint Compound
To achieve the best results when taping and bedding drywall seams, it’s essential to start by applying the joint compound (also known as mud) to the seams. Scoop some mud onto a broad knife using a mud pan and spread an even layer on both sides of the seam. The mud helps to adhere the tape to the wall and levels out the surface.
Embedding Tape
Next, we need to embed the tape into the joint compound. Cut a piece of tape to fit the length of the seam, then press it into the mud using your fingers. Starting from the middle of the seam, firmly drag a taping knife along the tape to remove any excess mud and secure it. It’s crucial to bed the tape smoothly, eliminating air bubbles and wrinkles for a flawless finish.
Finishing Inside and Outside Corners
To finish the inside corners, we first apply mud to both sides of the corner. Then, fold the tape lengthwise and press it into the mud, ensuring it’s centred over the corner. Smooth the tape with a taping knife, working from the centre outwards. We need to attach a corner bead for outside corners to protect the exposed drywall edge. Apply mud to the corner, position the corner bead, and press it into the mud. Secure it further with a hammer and nails, if necessary. Use a corner trowel to smooth out the mud over the corner bead.
Preparing and finishing the drywall seams and corners are critical steps. Using the proper tools and techniques, such as a quality mud pan, taping knife, and corner bead, we can ensure a smooth and seamless, professional-quality result.
Sanding and Smoothing Drywall
Sanding Seams and Imperfections
When it comes to sanding and smoothing drywall, we first need to tackle any seams and imperfections. These can include unevenness where two pieces of drywall meet or rough spots created by the excess joint compound.
To sand seams and imperfections, we recommend starting with coarse-grit sandpaper (around 80-100 grit) to remove the bulk of the roughness. After the initial pass, switch to finer-grit sandpaper (120-150 grit) to finish the sanding process. This helps ensure a smooth and even surface ready for priming and painting.
Remember to sand in a back-and-forth motion, applying even pressure throughout the process. A drywall sanding block can make this job easier and yield better results.
Dealing with Holes and Cracks
Holes and cracks in drywall are common but can be quickly addressed. For small holes and cracks, we recommend using a lightweight spackling compound. Apply the compound with a putty knife, press it firmly into the hole or crack, and remove any excess. Allow the spackling to dry completely (usually 24 hours) before sanding.
To sand the repaired areas, start using fine-grit sandpaper (180-220 grit) and gently sand gently in a circular motion, blending the edges of the repair with the surrounding wall. Be careful not to sand too aggressively and damage the surrounding surface.
For larger holes and cracks, it may be necessary to use a pre-made patch or a piece of drywall cut to size. Secure the patch to the wall and apply a joint compound to blend it with the surrounding area. Once the joint compound is dry, sand the area following the same process as with more minor repairs.
Applying Primer and Paint
Choosing a Primer
When achieving a flawless finish on your drywall, the first essential step is selecting the proper primer. A high-quality primer will create a solid, uniform surface and improve the paint and drywall adhesion. We recommend using a water-based primer like PVA (polyvinyl acetate) for easy clean-up and a strong bond.
Selecting a High-Quality Paint
Next, let’s consider the paint itself. Choosing high-quality paint that provides excellent coverage and durability is crucial. We suggest selecting a paint with a matte or low-sheen finish, as this will help to hide any imperfections in the drywall. When shopping for paint, look for these key factors:
- One-coat coverage: This feature ensures your paint job will be efficient and require less paint overall.
- Washable: A washable finish allows for easy maintenance and cleaning without damaging the paint job.
- Mildew resistance: This property is crucial in moisture-prone areas like bathrooms and kitchens.
Painting Technique
Now that we’ve discussed the importance of primer and paint selection, we’ll share some techniques to ensure a flawless finish. Choose from the following tools for applying paint:
- Sprayer: A paint sprayer provides a seamless and speedy application. However, it requires additional prep work, such as masking off areas not to be painted.
- Roller: A roller offers excellent coverage and is suitable for large, flat walls. Use a roller with a 3/8-inch nap for the best results.
- Brush: Paintbrushes work well for small areas or detailed work. Opt for a high-quality, angled sash brush with synthetic bristles.
When applying paint, follow these essential steps:
- Apply the primer: A roller or sprayer coats the entire surface evenly. Allow the primer to dry for at least 24 hours.
- Apply the first layer of paint: Using your selected tool (sprayer, roller, or brush), apply the paint using “N” and “W” motions. This technique ensures the even distribution of the paint.
- Let the paint dry: Give the paint at least 4 hours before continuing.
- Apply additional layers: Depending on the paint’s coverage, you may need to add extra layers. Remember to let each layer dry between applications.
Following these guidelines ensures we’ll achieve a flawless finish on our drywall project.
Finishing Touches
After mastering the technique of drywall finishing, it’s time to add the final touches to your project to achieve a flawless result. This section walks you through two crucial steps to complete the job: attaching fixtures and electrical devices and adding trim and baseboards.
Attaching Fixtures and Electrical Devices
Once the drywall is ready, you can start attaching fixtures and electrical devices like switches, sockets, and lighting. This process must be done meticulously to ensure a professional outcome:
- Electrical devices: Ensure all the wiring is safely done following local electrical codes, and switch off the power before you start. Attach the devices snugly to the wall, avoiding over-tightening the screws.
- Wallpaper: Wallpaper can give your walls a fresh appearance and hide minor imperfections in the drywall finishing. Choose a high-quality wallpaper that complements the room’s décor and carefully apply it to the surface, following the manufacturer’s instructions.
- Lighting fixtures: When it comes to lighting, select fixtures that enhance the room’s ambience and functionality. Consulting with a professional like our experienced contractors.com team can help you make well-informed decisions about the correct type of lighting for your space.
Adding Trim and Baseboards
Trim and baseboards are essential for covering gaps between the wall and the floor or ceiling and protecting the drywall edges. Here are some steps to follow when adding these finishing touches:
- Measure and cut: Accurately measure the lengths and angles required for the trim or baseboards. Cut the pieces to the exact sizes using a mitre saw for a seamless fit.
- Install the trim: Attach the trim to the wall using a nail gun or a hammer and nails. Place nails every 16 inches apart or following the studs in the wall, and sink them slightly below the trim’s surface.
- Caulking and painting: Apply a thin bead of paintable caulk along the top edge of the trim, where it meets the wall, to fill any gaps. Once the caulk has dried, apply a coat of paint to the trim and baseboards, ensuring it matches or complements the wall colour.
By following these steps, you can create a polished, professional finish in your home, allowing you to take pride in your perfectly finished drywall project.
Tips and Tricks from Professionals
Achieving a Flawless Finish
As professionals, achieving a flawless finish requires some essential tools and techniques. First, invest in a paddle mixer for blending your joint compound. A well-mixed compound will ensure a smooth consistency, contributing to a superior finish.
Next, opt for stainless steel tools like taping knives, trowels, and mud pans. These tools resist rust and maintain a sharp edge, resulting in cleaner cuts and smoother seams. The right tools will help you get the job done effectively without compromising the quality of your work.
Maximizing Efficiency
To maximize efficiency, follow these recommendations:
- Organize your workspace: Have all your tools and materials within easy reach to minimize downtime and reduce the risk of errors.
- Use purpose-specific products: Different areas of a drywall finishing job require different tools and materials. Use a setting-type compound for filling gaps and prefilling joints, while an all-purpose compound is ideal for taping, feathering, and touch-ups.
- Learn from experience: Practice makes perfect. The more you work with drywall, the better you will become at achieving a flawless finish. Feel free to try new techniques and ask for advice if you need clarification.
By keeping these tips and tricks in mind, you’ll be well on your way to mastering drywall finishing and achieving flawless results on your projects.