Cutting Fiberglass Made Easy: A Step-by-Step Guide with Oscillating Tools
Introduction
Cutting fiberglass can be a challenging task, especially if you need the right tools or techniques at your disposal. Fiberglass, a composite material of fine glass fibers embedded in a polymer matrix, is known for its strength and durability.
It is commonly used in various applications such as boat building, automotive parts, construction materials, and DIY projects. Whether you are a professional tradesperson or an enthusiastic hobbyist, understanding how to cut fiberglass effectively is essential to achieve clean and precise results.
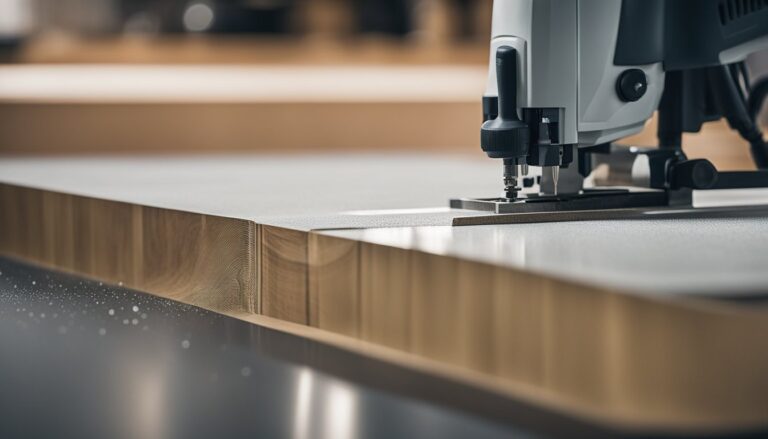
When cutting fiberglass, an oscillating tool can make the process more manageable and efficient. Oscillating tools have gained popularity among artisans due to their versatility and ability to handle various materials precisely.
These tools utilize high-frequency oscillations to move the blade back and forth rapidly, allowing for precise cuts without putting excessive strain on the material. Before delving into the specifics of cutting fiberglass with oscillating tools, it is crucial to prioritize safety measures.
Fiberglass dust can be harmful when inhaled or when it comes into contact with skin or eyes. Therefore, wearing protective gear such as safety goggles, gloves, a dust mask/respirator, and long-sleeved clothing is imperative throughout the cutting process.
To choose the right oscillating tool for your fiberglass cutting needs, consider factors like power output, speed settings tailored for working with composites like fiberglass (which typically require slower speeds), ergonomics for ease of use during extended periods of work and compatibility with suitable blades explicitly designed for fiberglass. Researching different models available on the market will help you make an informed decision based on your specific requirements.
In this comprehensive guide on cutting fiberglass with oscillating tools, we will walk you through step-by-step instructions on achieving clean cuts on straight edges and curved shapes in fiberglass materials. Moreover, we will discuss essential safety precautions to consider before starting any project involving fiberglass.
We will explore post-cut cleanup and finishing techniques to ensure professional-looking, aesthetically pleasing, and structurally sound results. Stay tuned for the subsequent sections as we delve into the intricacies of cutting fiberglass made easy with oscillating tools, providing you with all the knowledge you need to execute your fiberglass-related projects successfully.
Understanding Fiberglass and Its Characteristics
Fiberglass is a versatile and durable material commonly used in various industries and DIY projects.
It comprises tiny glass fibers embedded in a polymer resin, resulting in a solid composite material. Understanding the nature and characteristics of fiberglass is crucial before attempting to cut it.
One important consideration when working with fiberglass is its composition. The glass fibers provide strength, while the resin matrix holds them together.
This combination gives fiberglass unique properties, such as high tensile strength, chemical and heat resistance, and excellent electrical insulation capabilities. These characteristics make fiberglass suitable for applications ranging from boat building to construction.
When cutting fiberglass, an oscillating tool provides several advantages over other cutting tools. Unlike saws or rotary tools that generate heat or vibrations, which can damage the material or cause splintering, an oscillating tool offers precise control and minimal vibration during cutting.
Its back-and-forth motion allows for clean cuts without compromising the integrity of the fiberglass structure. To achieve clean cuts on fiberglass, there are some tips you should keep in mind.
First, ensure you have selected the appropriate blade for your oscillating tool. Blades designed for cutting fiberglass have fine teeth that minimize splintering and produce smooth edges.
Adjusting the speed settings of your oscillating tool can also impact the quality of your cuts. Lower speeds are generally recommended for more delicate tasks, while higher speeds may be suitable for thicker or denser fibreglass sections.
To prevent any potential hazards during cutting operations, it is essential to prioritize safety measures when working with fiberglass. Always wear appropriate protective gear, such as safety goggles, to shield your eyes from flying debris or splinters during cutting.
Additionally, consider wearing gloves and a dust mask to avoid contact with irritating dust particles generated during the process. Understanding the properties of fiberglass is crucial before attempting any cutting operations involving this material.
Oscillating tools provide an excellent solution for cutting fiberglass due to their precision, minimal vibration, and versatility. By choosing the right blade, adjusting the tool’s speed settings, and taking necessary safety precautions, you can achieve clean cuts on fiberglass while minimizing potential risks or damage.
The Right Oscillating Tool for Fiberglass
When cutting fiberglass, choosing the right oscillating tool is crucial. With the wide range of options available on the market, it’s essential to select a tool that can handle the unique characteristics of fiberglass without causing damage or compromising safety.
In this section, we will explore some key factors when selecting an oscillating tool for working with fiberglass. First and foremost, choosing an oscillating tool specifically designed for cutting fiberglass is essential.
These tools are equipped with features that make them suitable for the task. Look for a model that offers variable speed settings, as different types of cuts on fiberglass may require varying speeds.
This flexibility gives you more control over the cutting process and achieves clean and precise results. Another crucial aspect to consider when selecting an oscillating tool for fiberglass is the type of blades it uses.
Opting for blades specifically designed for cutting fiberglass ensures optimal performance and longevity. Look for blades with fine teeth or carbide tips that can effectively cut through the material without causing splintering or chipping.
It’s worth mentioning that while other cutting tools like circular saws or jigsaws can also be used to cut fiberglass, oscillating tools have certain advantages. They offer excellent maneuverability and precision, allowing you to navigate intricate curves and shapes effortlessly.
Their compact size makes them ideal for smaller DIY projects involving fiberglass. Safety should always be a top priority when working with any material, especially as potentially hazardous as fiberglass.
Before purchasing an oscillating tool, ensure it has appropriate safety features such as blade guards and ergonomic handles. Additionally, invest in proper protective gear, such as gloves and goggles, to minimize the risk of injury from flying debris or accidental contact with sharp edges during the cutting process.
By considering these factors – including blade type, variable speed settings, maneuverability, and safety features -you can confidently choose the right oscillating tool for cutting fiberglass. Armed with the appropriate tools, you’ll be well-prepared to quickly tackle your fibreglass projects and achieve professional-looking results.
Safety Precautions to Consider
When working with fiberglass, it is essential to prioritize safety and take necessary precautions to ensure a smooth and accident-free cutting process. Here are some crucial safety measures to consider before starting your project: 1. Protective Gear for Fiberglass Work:
Always wear appropriate protective gear before handling fiberglass or using an oscillating tool. This includes safety glasses or goggles to protect your eyes from flying debris and particles.
Additionally, wearing a dust mask or respirator is advisable to prevent inhaling fiberglass particles that may be released during cutting. 2. Fiberglass Workshop Best Practices:
Create a designated workspace for your fiberglass cutting project. Ideally, this space should be well-ventilated and free from flammable materials.
Keep the area clean and organized to avoid tripping hazards or accidental contact with sharp tools. 3. Safety Measures when Cutting Fiberglass:
When operating an oscillating tool for cutting fiberglass, start by ensuring the tool is set at an appropriate speed for the material. Generally, lower speeds are recommended for fiberglass as higher speeds can generate excessive heat that may damage the material or cause it to melt.
In addition, maintain a firm grip on the oscillating tool while working on fiberglass surfaces to maintain control and minimize potential accidents. Avoid applying excessive pressure when cutting, as it may lead to blade slippage or breakage.
Always follow manufacturer guidelines for your oscillating tool model, as recommendations may vary. By adhering strictly to these safety precautions, you will significantly reduce the risk of injury during your fiberglass cutting project while ensuring precise and clean cuts in your chosen DIY venture.
Preparing Your Workspace and Fiberglass
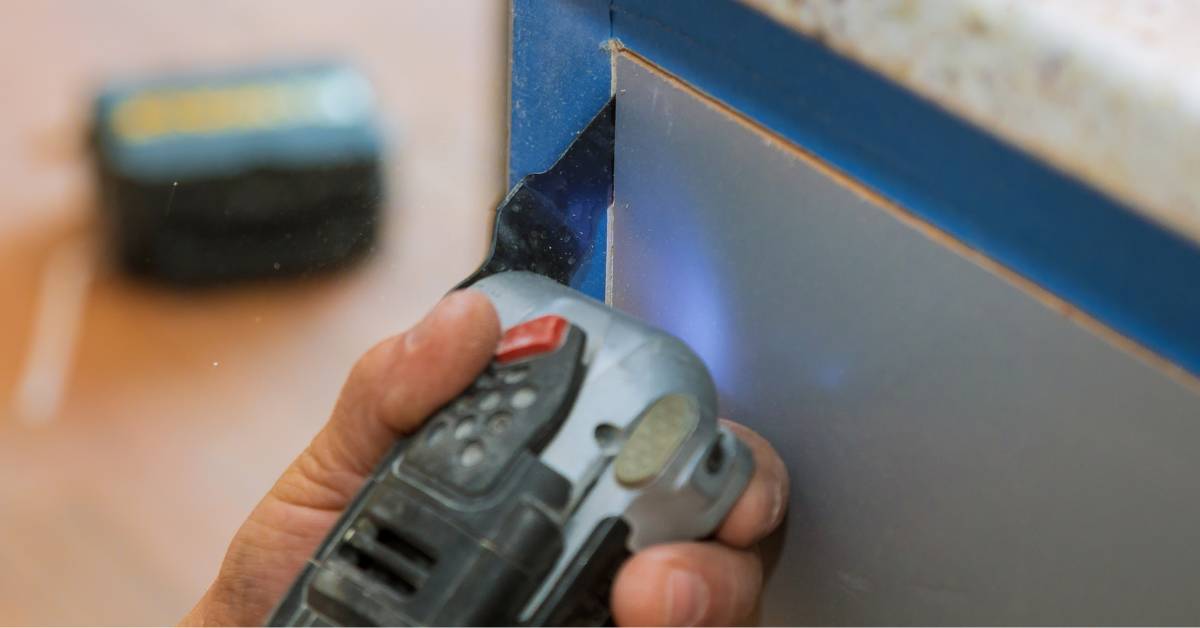
When embarking on a fiberglass cutting project, it is essential to establish a well-organized and safe workspace. Before you begin, gather all the necessary tools and materials, including your chosen oscillating tool equipped with the appropriate blade for cutting fiberglass.
Additionally, ensure that you have suitable protective gear for working with fiberglass, such as safety goggles, gloves, and a dust mask. Start by clearing your workspace of debris or clutter that could hinder your movements or cause accidents.
Remove any nearby flammable substances to minimize fire hazards. Since fiberglass can create harmful fine particles if inhaled or ingested, consider setting up a designated area with proper ventilation to mitigate dust accumulation.
Next, prepare the fiberglass itself for cutting. If you are working with large sheets or panels of fiberglass, carefully secure them in place using clamps or sturdy support structures like sawhorses.
This will stabilize the material during cutting and prevent accidental slips that may result in uneven cuts or damage to the fibers. Before proceeding further, it is advisable to consult a fiberglass cutting guide specific to your project’s requirements.
Different techniques may be employed depending on whether you need straight lines or curved shapes cut from the fiberglass sheets. Note any special considerations or precautions in the guide to ensure accurate and safe cutting.
Now that your workspace and the fiberglass are appropriately prepared, you can confidently employ an oscillating tool for precise cuts on your fiberglass material. Remember that oscillating tools offer several advantages when working with fiberglass due to their versatility and ability to maneuver easily through intricate cuts without causing excessive vibrations that could damage delicate fibers.
In selecting the appropriate oscillating tool blades for this task, opt for ones specifically designed for cutting through fibrous materials like fiberglass. These blades typically feature sharp teeth made from durable materials such as high-carbon steel or bi-metal constructions capable of resisting wear caused by the fiberglass’s abrasive nature.
By taking these necessary precautions and ensuring your workspace is well-organized, you set yourself up for success when cutting fiberglass. With the right protective gear, suitable preparation of both the workspace and fiberglass, and choosing the correct oscillating tool and blade, you will be ready to move on to the next step: the cutting process.
The Cutting Process: A Detailed Walkthrough
Now that you have taken all the necessary safety precautions and prepared your workspace and fiberglass, it’s time to delve into the cutting process.
This detailed walkthrough will guide you through the various stages of cutting fiberglass using an oscillating tool. Before diving into cutting, choosing the right oscillating tool for your fiberglass project is crucial.
Consider factors such as power, speed settings, and blade compatibility. Opting for an oscillating tool for working with delicate materials like fiberglass is advisable.
Look for a tool with variable speed control, giving you greater precision and control over your cuts. Once you have selected your oscillating tool, it’s time to attach the appropriate blade.
For cutting fiberglass, it is recommended to use a bi-metal or carbide-toothed blade specially designed for delicate materials. These blades are known for their durability and ability to provide clean cuts without causing excessive damage or splintering.
Start with a shallow plunge cut when initiating the cut on your fiberglass material. This allows you to gradually penetrate the surface without exerting excessive force.
Move the oscillating tool steadily along your marked cutting line while maintaining consistent pressure against the material. To achieve clean cuts on fiberglass surfaces with an oscillating tool, it’s crucial to adjust its speed settings accordingly.
A medium-speed setting works well in most cases; however, adjusting speeds may be necessary depending on the thickness and density of the material being cut. Experiment with different speeds on scrap fiberglass pieces before proceeding with your main project.
Cutting curved shapes in fiberglass can be challenging but achievable with an oscillating tool. To do so effectively, approach curved cuts slowly and steadily while maintaining a firm grip on the material and the tool.
Take extra care around corners or tight curves to ensure precise cuts without damaging the fiberglass. Once you have completed the cutting process, it’s time to focus on post-cut cleanup and finishing.
Inspect your cut edges for any roughness or unevenness. Using a fine-grit sandpaper or a deburring tool, gently smooth out imperfections along the cut edges.
Be cautious not to apply excessive pressure that may cause damage to the fiberglass. An oscillating tool can be valuable when working with fiberglass for various DIY projects.
Its versatility, precision, and ability to produce clean cuts make it an ideal choice. By following these detailed steps and utilizing the appropriate safety measures and techniques, you can confidently tackle cutting fiberglass with an oscillating tool and achieve professional results every time.
Post-Cut Cleanup and Finishing
After successfully cutting through the fiberglass using your oscillating tool, moving on to the next step, post-cut cleanup and finishing, is crucial. This stage is essential for achieving a professional-looking result and ensuring that your fiberglass project is safe for handling. Let’s delve into the details of this vital process.
First and foremost, it is imperative to prioritize safety during post-cut cleanup. Fiberglass can generate sharp edges and splinters, which can cause injury if improperly handled.
Therefore, before proceeding with further steps, wear appropriate protective gear for fiberglass work, such as gloves and safety glasses. This will minimize the risk of accidental cuts or exposure to harmful fibers.
Next, take a moment to assess the cut edges of your fiberglass piece. Cutting fiberglass with an oscillating tool usually results in clean cuts.
However, some minor imperfections or rough edges may still be present. To achieve smoother edges and enhance the overall aesthetic appeal of your project, consider employing some finishing techniques.
One effective method involves using sandpaper or sanding pads explicitly designed for fiberglass materials. Start with coarser grit sandpaper (around 80-120) to remove any prominent imperfections or rough areas along the cut edge.
Gradually progress to finer grits (such as 220-400) until you achieve a smooth and even finish. Be sure to maintain consistent pressure while sanding and keep the oscillating tool at an appropriate speed setting for fiberglass – usually between medium to high speed, depending on the thickness of your material.
Finishing touches can also be applied using polishing compounds designed for fiberglass materials. Apply a small amount of compound onto a clean cloth or pad and gently buff the cut edge in circular motions until you achieve a glossy finish.
This step improves aesthetics and helps seal any exposed fibers that may irritate. Following these post-cut cleanups and finishing steps meticulously ensures that your fiberglass project is visually appealing and safe to handle.
Remember, cleaning and finishing the cut edges properly will significantly enhance the outcome of your DIY fiberglass project. With oscillating tools, their versatility and precision make them an ideal choice for cutting curved shapes in fiberglass. You can achieve flawless results with the proper techniques and attention to detail.
Maintenance and Care for Your Oscillating Tool
Proper maintenance and care are essential to ensure your oscillating tool’s longevity and optimal performance when working with fiberglass.
Following simple guidelines, you can keep your tool in excellent condition and maximize its efficiency. To start, it is crucial to clean your oscillating tool after each use regularly.
Fiberglass dust and debris can accumulate on the tool’s surface, potentially clogging the mechanisms and affecting functionality. Use a brush or compressed air to remove any residue from the tool body, ensuring all vents are clear of obstructions.
Please pay close attention to the blade attachment area, as fiberglass particles may adhere to it. Wipe the tool with a soft cloth or rag for a thorough clean.
Another critical aspect of maintenance is lubrication. According to the manufacturer’s instructions, apply a small amount of lubricating oil to the moving parts of your oscillating tool, such as the pivot points and gears.
This will help reduce friction, prevent premature wear, and maintain smooth operation. Avoid over-lubricating, as excess oil can attract dust and debris.
When working with fiberglass materials that produce splinters during cutting, take extra precautions to protect yourself and your oscillating tool. Always wear appropriate personal protective equipment (PPE), including safety glasses or goggles, gloves, long sleeves, and a dust mask or respirator designed for fiberglass work.
Additionally, consider using an oscillating tool equipped with a dust collection system or attaching an external vacuum for efficient debris removal during cutting. In terms of storage, find a dry place to keep your oscillating tool safely away from moisture or extreme temperatures.
Avoid exposing it to direct sunlight or storing it in humid environments, as these conditions can cause damage over time. Consider using a protective case or bag designed for oscillating tools to prevent accidental impacts during transportation or storage.
Remember that different manufacturers may provide specific recommendations for maintenance and care, so always refer to the user manual for your particular tool. By diligently following these guidelines and maintaining your oscillating tool, you can ensure its optimal performance and extend its lifespan, making it a reliable companion for all your future fiberglass DIY projects.
Conclusion
Working with fiberglass can be a rewarding and enjoyable experience, especially when armed with the proper knowledge and tools. Throughout this guide, we have extensively explored the various aspects of cutting fiberglass with oscillating tools. We have discussed the importance of choosing the right oscillating tool for fiberglass work and highlighted the critical safety measures to consider before diving into any project.
By wearing protective gear and following best practices, we can ensure a safe and successful experience. Furthermore, we delved into the necessary preparations for cutting fiberglass, including workspace setup and proper material handling.
We explored the step-by-step cutting process, providing valuable insights into techniques that yield clean cuts on both straight lines and curved shapes. Additionally, we discussed post-cut cleanup and finishing techniques to achieve a professional-looking final product.
It is worth emphasizing how oscillating tools have proven invaluable for fiberglass projects due to their versatility, precision, and control. Their ability to adjust speed settings ensures optimal results while reducing heat buildup or potential damage to delicate surfaces.
When selecting blades for oscillating tools specifically designed for fiberglass cutting, one must prioritize durability and a fine-tooth design that minimizes splintering. In closing, armed with this comprehensive guide on cutting fiberglass made easy with oscillating tools, you are now equipped with the knowledge required to tackle your future projects confidently.
Always prioritize safety by wearing appropriate protective gear and following best practices when working in your workshop or DIY space. With training and attention to detail, your mastery of these techniques will undoubtedly lead you towards successful endeavors in working with fiberglass materials – opening up a world of possibilities for creative expression while achieving professional-grade results!

