The Efficient Approach To Window Putty Removal Using An Oscillating Tool
Introduction
Window putty is a crucial component in maintaining the integrity and functionality of windows. As a sealant, it prevents air and water leakage while providing structural support to the glass panes.
Over time, however, putty can deteriorate or become damaged, necessitating its removal and replacement. The task of removing window putty is often deemed laborious and time-consuming.
However, this process has become significantly more efficient with the advent of modern tools such as oscillating tools. Understanding Window Putty and Its Role:
Before delving into the efficiency provided by oscillating tools in window putty removal, it is essential to comprehend the nature of the substance itself. Window putty primarily consists of a combination of linseed oil and whiting (a chalk-like substance).
This mixture forms a pliable compound that hardens over time through oxidation. In addition to its sealing properties, window putty creates an aesthetic finish for windows by filling gaps between glass panes and frames.
To the Oscillating Tool: The oscillating tool is a versatile handheld power tool that utilizes rapid side-to-side oscillations for various applications.
This tool features interchangeable accessories such as blades, scrapers, sanding pads, and grout removers to cater to different tasks effectively. The oscillating motion of this tool allows for precise control during operation while minimizing vibration transfer to the user’s hand.
Why Use an Oscillating Tool for Putty Removal: An oscillating tool proves indispensable when removing window putty efficiently and accurately without damaging surrounding surfaces or compromising structural integrity.
An oscillating tool offers several advantages, unlike traditional methods like chiselling or scraping using manual tools that often result in tedious quality or potential damage to adjacent areas such as wooden frames or glass panes. Firstly, due to its compact size and ergonomic design, an oscillating tool provides exceptional maneuverability even in tight spaces.
This capability is especially crucial when working on intricate window frames or sashes, where precision is paramount. Secondly, the oscillating action of the tool ensures controlled and gentle removal of putty from delicate surfaces, reducing the risk of accidental damage.
The oscillating motion prevents excessive force from being applied to the putty or adjacent materials while effectively breaking its bond with minimal effort. An oscillating tool’s compatibility with a range of specialized accessories enables it to adapt to different scenarios and materials encountered during putty removal.
Whether tackling hardened or aged putty, an appropriate accessory can be chosen based on the condition and thickness of the putty, ensuring optimal performance and efficiency. Utilizing an oscillating tool for window putty removal can achieve exceptional precision and efficiency while minimizing potential damage or time investment.
The following sections will explore a step-by-step guide and valuable tips for using this versatile tool for efficient putty removal. (Note: The following sections will cover the Step-by-Step Guide to Putty Removal with an Oscillating Tool; Tips for Efficient Putty Removal; After the Putty Removal: What’s Next?; Conclusion; and Frequently Asked Questions.)
Understanding Window Putty and Its Role
Window putty is a versatile material that plays a crucial role in ensuring the durability and functionality of windows.
It is a sealant, providing an airtight and watertight barrier between the window frame and the glass pane. Putty also helps secure the glass, preventing any movement or rattling.
Its primary function is to create a tight bond between two components, ensuring proper insulation while maintaining the window’s structural integrity. Traditionally, window putty has been composed of linseed oil mixed with whiting (finely powdered chalk) or other additives such as clay or silica.
This mixture forms a pliable compound that can be easily manipulated and moulded into shape. Once applied to the window frame, putty gradually hardens over time through a process known as curing.
The curing process of putty involves oxidation and polymerization of the linseed oil present in its composition. As it cures, putty undergoes chemical changes that transform it from a soft paste into a solid substance with excellent adhesion properties.
The hardened putty creates an effective barrier against moisture infiltration, heat loss, noise transmission, and drafts. Window putty’s longevity largely depends on its quality and proper application technique.
Over time, exposure to external factors such as sunlight, temperature fluctuations, humidity levels, and general wear-and-tear can cause material deterioration. This degradation can result in cracks or gaps forming within the putty layer, compromising its effectiveness as a sealant.
Regular inspection and maintenance are essential to ensure window putty remains in good condition. If signs of deterioration appear – such as crumbling edges or loosened sections – prompt action is necessary to repair or replace it.
Removing old or damaged putty is crucial before applying fresh layers to guarantee optimal results. Understanding window putty’s role goes beyond recognizing it as merely an adhesive substance; it serves as a protective barrier that enhances the overall performance of windows.
Its ability to create a waterproof and airtight seal and its capacity to secure the glass pane in place makes it indispensable for window construction and maintenance. By comprehending the nature and purpose of window putty, you can appreciate the significance of using an efficient approach like an oscillating tool for its removal and replacement.
Introduction to the Oscillating Tool
An oscillating tool, also known as a multi-tool or oscillating multi-tool (OMT), is a versatile and powerful tool that has gained immense popularity among DIY enthusiasts and professionals alike.
With its unique oscillating motion, this tool can be employed for various tasks, including cutting, scraping, sanding, and grinding. The versatility of the oscillating tool stems from its ability to accommodate multiple interchangeable attachments that cater to specific applications.
One key feature that makes the oscillating tool indispensable for window putty removal is its compact size and maneuverability. Unlike many other power tools, an oscillating tool is lightweight and easy to handle.
Its ergonomic design allows users to maintain control and precision even in tight corners or intricate areas around windows. This makes it ideal for small-scale projects such as removing putty from window frames.
The oscillating tool generates rapid back-and-forth movements in a side-to-side motion at high frequencies. This unique action allows it to perform tasks while minimizing user fatigue efficiently.
The rapid vibrations produced by the oscillation create friction against the surface being worked on, which aids in loosening and dislodging stubborn materials like window putty without causing damage to the underlying structure. Equipped with various attachments specifically designed for different purposes, an oscillating tool offers versatility that sets it apart from other tools commonly used for putty removal.
Depending on the type of putty you are dealing with or your preferred removal method, you can easily switch between attachments such as scrapers, sanding pads or diamond-edged blades designed explicitly for grout removal. In addition to its ease of use and adaptability, an oscillating tool’s speed control feature allows users to adjust its velocity according to their requirements.
This feature proves particularly useful when working on delicate surfaces such as wooden window frames where excessive speed may cause damage. Furthermore, the oscillating tool’s compatibility with a dust extraction system minimizes the mess created during putty removal, ensuring a cleaner and more efficient working environment.
The oscillating tool is an invaluable asset for window putty removal. Its compact size, maneuverability, and versatility make it an excellent choice for DIY enthusiasts and professionals.
With its rapid oscillating motion, interchangeable attachments, adjustable speed control, and dust extraction compatibility, this tool offers optimal efficiency while ensuring precision and protection for delicate window frames. So whether you’re a seasoned professional or an enthusiastic homeowner eager to restore your windows’ former glory, the oscillating tool is undoubtedly a valuable addition to your toolkit.
Why Use an Oscillating Tool for Putty Removal
Regarding removing window putty, several tools are available on the market. However, an oscillating tool is a highly effective choice for this task.
Its versatility and precision make it an ideal tool for tackling the challenges of putty removal with ease. One of the primary reasons to choose an oscillating tool for putty removal is its ability to handle various materials.
Whether dealing with hardened glazing compounds, old and brittle putty, or even caulk residue, this tool can effortlessly cut through them all. The oscillating motion of the blade allows for precise control and enables you to reach tight corners and difficult angles without causing damage to adjacent surfaces.
Furthermore, unlike other tools, such as chisels or scrapers that require significant manual strength and effort, an oscillating tool does most of the work for you. The motorized oscillations create a back-and-forth blade movement at high speeds, effectively loosening and breaking up the putty without exerting excessive force on your part.
This not only saves time but also reduces fatigue during prolonged projects. Another advantage of an oscillating tool is its ability to minimize mess and dust generation during putty removal.
Equipped with efficient dust extraction systems or attachments, these tools efficiently capture debris as they operate. This means less cleanup time after each session and a cleaner working environment overall.
Moreover, an oscillating tool offers convenience in terms of interchangeable blades specifically designed for various aspects of putty removal. You can select from a range of blades suitable for different profiles or sizes of window frames.
Whether you need to remove wide strips or narrow sections of putty, a blade option is likely available that perfectly fits your requirements. Opting for an oscillating tool when embarking on window putty removal is undoubtedly wise due to its versatility, precision, and efficiency.
Its capability to handle different materials, ease of use, minimal dust generation, and availability of specialized blades make it the go-to tool for this particular task. By harnessing the power of an oscillating tool, you can ensure smoother and more effective putty removal while maintaining the integrity of your window frames.
Step-by-Step Guide to Putty Removal with an Oscillating Tool
1. Prepare the work area:
Before beginning the putty removal process, preparing the work area properly is essential. Start by ensuring that all nearby surfaces, such as glass panes or surrounding frames, are adequately protected to prevent accidental scratches or damage.
You can use masking tape and plastic sheets to cover these areas securely. 2. Attach the appropriate blade:
Once the work area is ready, select a suitable blade for your oscillating tool. A rigid scraper blade or a carbide-tipped rasp attachment best removes putty.
Ensure the blade is securely attached according to the manufacturer’s instructions before proceeding. 3. Begin with an edge:
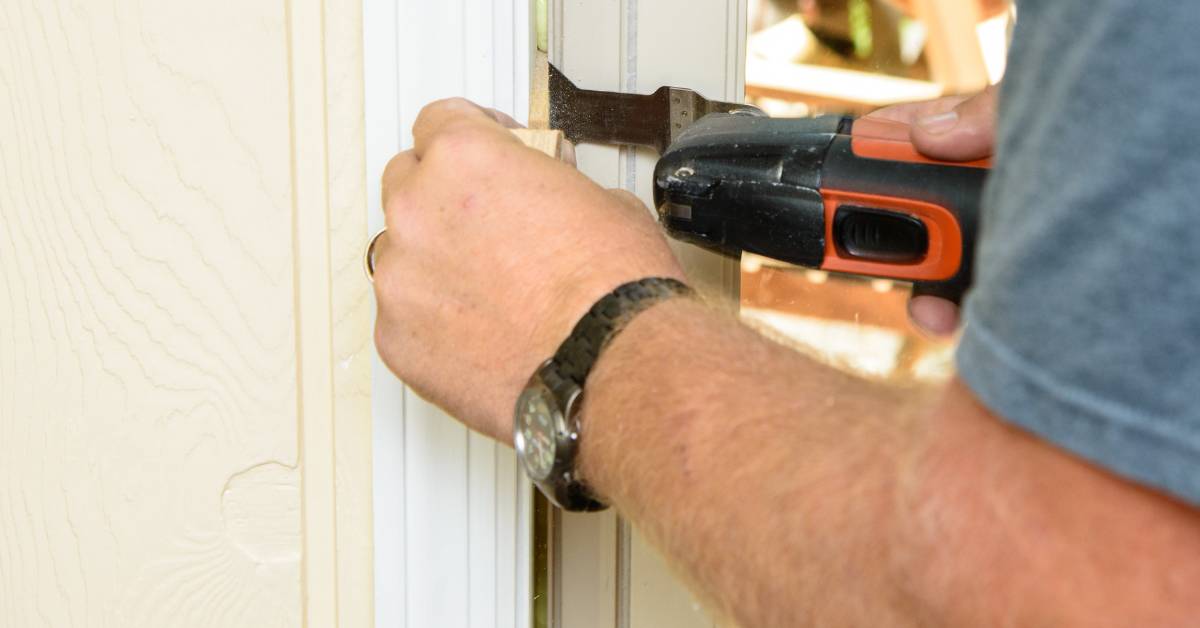
Locate a starting point along one edge of the window and position the oscillating tool at a slight angle against the putty. Apply gentle pressure and switch on your tool at a low-speed setting to prevent any unnecessary vibration or damage.
4. Slow and steady motion: Move the oscillating tool slowly along the length of the window putty while maintaining consistent pressure against it.
The oscillating motion of the tool helps break up and loosen stubborn putty without causing excessive strain on either yourself or your windows. Maintaining control over your tool throughout this process is crucial, ensuring that you achieve smooth and controlled movements.
5. Remove loosened putty: As you continue working along each section of putty, you will notice it is gradually reducing from its original position.
Take care not to rush this step; instead, patiently guide your oscillating tool through each portion until all excess putty has been removed successfully. 6. Clean up residue:
Once all visible traces of old putty have been removed using your oscillating tool, take some time to clean up any remaining residue left behind on both glass and frame surfaces. You can use a mild solvent, such as denatured alcohol or acetone, to dissolve and wipe away any stubborn remnants.
Follow the manufacturer’s instructions and take necessary safety precautions when working with solvents. 7. Smoothen the surface:
After the putty removal, you may find some uneven areas or rough spots on the window frame. To achieve a flawless finish, use sandpaper or a sanding attachment on your oscillating tool to gently smooth out these imperfections.
Take care not to apply excessive force that could damage the wood or other materials. 8. Clean and inspect:
Thoroughly clean the window area using a damp cloth or sponge to remove dust or debris from the putty removal process. Scrutinize the window for any remaining traces of putty and repeat steps if necessary until you achieve a clean and smooth surface ready for the reapplication of fresh putty.
By following this step-by-step guide with an oscillating tool for putty removal, you can efficiently complete this task while minimizing potential damage to your windows. Always prioritize safety by wearing appropriate protective gear, such as gloves and safety goggles, throughout the process.
Tips for Efficient Putty Removal
1. Choosing the Right Blade:
Selecting the appropriate blade when using an oscillating tool for window putty removal is crucial to achieving efficient results. Opt for a rigid scraper blade designed to remove hardened materials like putty.
These blades typically have sharp edges and are slightly angled to provide better control and precision during scraping. Additionally, consider using a wider blade as it can cover more surface area, reducing the time and effort required for putty removal.
2. Adjusting Speed and Oscillation Angle: Appropriately adjusting your oscillating tool’s speed and oscillation angle is essential to ensure efficient putty removal.
Start with a moderate speed setting that lets you control the tool while effectively removing the putty. Higher speeds may cause vibrations that could damage delicate window frames or break glass panes if not handled carefully.
Additionally, experimenting with different oscillation angles can help find the optimal approach for effective putty removal based on your specific window configuration. 3. Applying Adequate Pressure:
While using an oscillating tool, applying adequate pressure is essential for efficient putty removal without causing any unwanted damage. Use a firm but gentle grip on the tool handle, ensuring it remains steady during operation.
Apply consistent pressure along the edge of the removed putty, allowing the blade to glide smoothly without excessive force or strain on either hand or wrist. 4. Removing Residual Putty:
After scraping off most of the window putty, small remnants might be left behind on both glass surfaces and frames. To ensure a clean finish, utilize finer sandpaper or abrasive pads suitable for your window material (e.g., glass or wood).
Gently sand down any remaining traces of putty until both surfaces are smooth and free from any residue. 5. Safety Precautions:
Always prioritize safety while working with an oscillating tool for putty removal. Wear appropriate personal protective equipment, including safety goggles and gloves, to shield yourself from flying debris or accidental slips.
Additionally, consider using a dust mask to prevent inhaling any fine particles generated during the process. Regularly inspect the condition of your oscillating tool and ensure it is in good working order before use.
By following these tips, you can maximize the efficiency of your putty removal process using an oscillating tool while maintaining high precision and minimizing any potential risks or damage to the window frames or glass panes. With proper blade selection, speed adjustment, optimal pressure application, thorough residue removal, and adherence to safety precautions, you will achieve a professional result that leaves your windows ready for new putty or any desired finishing touches.
After the Putty Removal: What’s Next?
Now that you have successfully removed the window putty using an oscillating tool, it is crucial to address what steps to take next to ensure a well-prepared surface for further window restoration or any other necessary repairs. Here are some essential matters to consider:
1. Clean and Prepare the Window Frame: After removing the putty, residue and debris will likely be left behind.
Begin by thoroughly cleaning the window frame using warm water and mild dish soap. Gently scrub away any remaining traces of putty, being careful not to damage the wood or glass surface.
Rinse with clean water and allow it to dry completely. 2. Assess the Condition of the Window Frame:
With the putty removed, now is an opportune time to inspect the window frame’s condition. Look out for any signs of decay, rot, or damage caused by moisture or pests.
If you notice any structural issues or compromised areas, it may be necessary to consult a professional window technician for further evaluation and repairs. 3. Apply Wood Preservative (if needed):
If your window frame is made of wood, it is highly recommended to apply a wood preservative before proceeding with any additional steps. This will help protect against future rotting or deterioration caused by exposure to weather elements.
Follow manufacturer instructions carefully when applying and allow ample drying time before moving forward. 4. Consider Repainting or Refinishing:
Once your window frame is clean and in good condition, it might be an ideal opportunity for repainting or refinishing if desired. Assess whether your current paint job requires touch-ups or if you would like a fresh coat altogether.
Properly prepared frames can result in a more professional-looking finish when undertaking this step. By diligently following these post-putty removal steps, you can ensure that your windows are well-maintained and ready for further restoration or repairs.
Taking the time to clean, assess, and address any additional work will contribute to your windows’ longevity and aesthetic appeal, enhancing their functionality and visual charm. Remember, proper care and maintenance of your windows are essential in preserving their value and protecting your investment in the long run.
Conclusion
Utilizing an oscillating tool for window putty removal proves an efficient and time-saving method.
The versatility and precision offered by these tools make them a valuable asset for any DIY enthusiast or professional contractor. Following the step-by-step guide in this article, you can successfully remove old, deteriorated putty from your windows without causing any damage.
One of the significant advantages of using an oscillating tool is its ability to remove putty without exerting excessive force or pressure on the glass. This minimizes the risks associated with accidental breakage or cracks often occurring using traditional methods such as chisels or knives.
The oscillating motion of the tool allows for controlled and precise movements, ensuring that only the putty is removed while preserving the integrity of the window frame. Furthermore, an oscillating tool equipped with various accessories provides flexibility in tackling different putty removal tasks.
Whether you are working with soft, pliable putty or stubborn and hardened compounds, specialized blades and attachments are available that cater to specific requirements. This adaptability ensures that no matter the condition of your window putty, you can achieve thorough removal without compromising quality.
Additionally, it is essential to highlight how using an oscillating tool reduces time and effort compared to traditional methods. The rapid oscillation speed and precise cutting action significantly speed up the process while maintaining accuracy.
With a steady hand and proper technique, you can complete putty removal on multiple windows within a fraction of the time it would take using conventional means. It’s essential to note that after removing old putty from your windows using an oscillating tool, further steps should be taken to ensure proper reinstallation of new putty or other sealing materials.
Thoroughly clean and prep the window frame surfaces before applying fresh materials according to manufacturer guidelines or professional advice if needed. Properly sealing your windows enhances their appearance and provides insulation, preventing drafts and ultimately contributing to energy efficiency.
An oscillating tool is undoubtedly a game-changer regarding window putty removal. Its precision, versatility, and time-saving qualities make it a highly effective tool for any restoration or renovation project involving windows.
Following the step-by-step guide outlined in this article and considering the tips provided, you can confidently embark on your putty removal journey, achieving professional results with minimal effort. Remember to prioritize safety and consult professionals to ensure successful outcomes in your window restoration endeavours.
Frequently Asked Questions
1. Can an oscillating tool damage the window frame during putty removal?
One common concern when using an oscillating tool for putty removal is the potential for damage to the window frame. However, an oscillating tool can be an effective and safe option when used correctly and appropriately.
To minimize any risks, selecting the appropriate blade or attachment for your specific needs is crucial. Opting for a blade specifically designed for delicate surfaces or utilizing a scraper attachment with rounded edges can help prevent scratches or dents on the window frame.
Another critical aspect is maintaining a controlled speed and pressure while operating the oscillating tool. Start at a lower speed setting and gradually increase it as needed, applying gentle and consistent pressure on the putty while keeping an eye on how the window frame reacts.
Being attentive and taking preventive measures can significantly reduce the chances of damaging your window frame during putty removal. 2. Can I use an oscillating tool for all types of window putty?
Although an oscillating tool offers versatility in removing various materials, it may not be suitable for all types of window putty. Traditional glazing putty or oil-based compounds are generally compatible with oscillating tools, as they are soft enough to be effectively removed by the scraping action of the blades or attachments.
However, more hardened or cement-like putties may require alternative methods, such as heat guns or chemical solvents, to soften them before using an oscillating tool. It’s essential to assess your specific type of putty before proceeding with this method, and consider consulting professionals if you encounter any difficulties determining its compatibility.
3. Should I take any safety precautions when using an oscillating tool? As with any power tool, safety should always be prioritized when using an oscillating tool for putty removal.
You should remember some precautions: a) Wear appropriate protective gear, such as safety goggles, gloves, and a dust mask, to shield yourself from flying debris and dust particles.
b) Ensure the tool is switched off and unplugged before attaching or changing blades. Also, handle the blades with caution to avoid accidental cuts or injuries.
c) Maintain a stable footing and correctly secure your workpiece to prevent slips or accidents. d) Regularly inspect the power cord for any damages or signs of wear.
Never use a tool with a damaged cord. e) Keep bystanders at a safe distance, especially when working in crowded areas or indoors.
You can minimize potential risks during putty removal by adhering to these safety measures and following the manufacturer’s instructions and guidelines for your specific oscillating tool model. 4. Can I use an oscillating tool for other home improvement tasks?
Absolutely! While an oscillating tool is handy for window putty removal, it is also versatile enough to tackle various other home improvement tasks.
With interchangeable blades and attachments available on the market, an oscillating tool can cut through materials like wood or drywall, sand surfaces, remove grout between tiles, or even trim metal pipes. Its precision and maneuverability make it an invaluable companion for DIY enthusiasts and professionals in their countless projects around the house.
Conclusion: Using an oscillating tool for window putty removal can be an efficient method if employed correctly.
By addressing frequently asked questions regarding potential damage to window frames, compatibility with different types of putty material, safety precautions when using the tool, and its versatility beyond putty removal alone; individuals can gain a comprehensive understanding of how to maximize their proficiency with this powerful device. With proper care and attention to detail throughout the process, along with adherence to manufacturer safety guidelines, users can confidently utilize an oscillating tool as they embark on various home improvement projects beyond just window putty removal.