A Handy Guide to Cutting Door Hinges with an Oscillating Tool
Introduction
Welcome to this comprehensive guide on cutting door hinges with an oscillating tool.
If you’re a DIY enthusiast or a homeowner looking to renovate or install new doors, mastering the art of precision cutting with oscillating tools is essential. This versatile tool is a game-changer for hinge cutting, providing accuracy and ease that other tools can’t match.
Before we delve into the specifics of the process, it’s crucial to understand the importance of safety when using oscillating tools. These powerful devices require careful handling and adherence to safety guidelines.
This guide will highlight various oscillating tool safety tips to ensure precise results and your well-being during every process step. Choosing the right oscillating tool and blade is paramount for successful hinge cutting.
Various models and blade types are available in the market, each with unique features and advantages. We will discuss the best oscillating tool blades for hinges, focusing on those specifically designed for precision cuts on wooden surfaces.
Now that we’ve touched upon the basics let’s dive into our step-by-step guide on cutting door hinges with an oscillating tool. From measuring and marking hinges accurately to fine-tuning their placements after installation, this comprehensive guide will equip you with all the knowledge and techniques for flawless hinge cuts.
But wait! Before we begin, ensure you have readily available all necessary safety equipment, such as goggles, gloves, and ear protection.
Safety should always be your top priority when working with power tools. Let’s embark on our journey of transforming your doors through precise hinge cuts using an oscillating tool!
Choosing the Right Oscillating Tool and Blade
One of the most crucial aspects of cutting door hinges with an oscillating tool is selecting the right tool and blade combination. With many options available, choosing an oscillating tool that suits your needs is essential. Beginners should opt for a user-friendly model that offers precise control and maneuverability.
Look for a tool with variable speed settings, allowing you to adjust the cutting speed according to your working material. In terms of blades, several types work well for cutting door hinges.
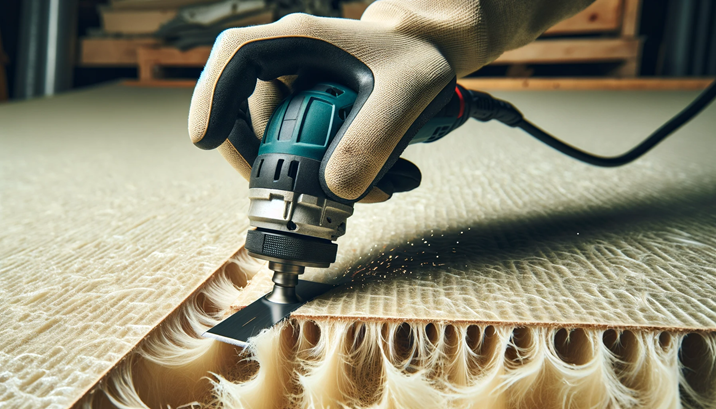
The most common blade type used for this task is a flush-cut or plunge-cutting blade. These blades have a narrow profile and sharp teeth that enable clean and accurate cuts without damaging the surrounding material.
Additionally, consider choosing blades specifically designed for cutting metal or wood, depending on the type of hinge you will be working with. Compatibility is another factor when selecting an oscillating tool and blade combination.
Ensure that your blades are compatible with your specific oscillating tool model. Most manufacturers provide information regarding compatibility on their websites or product packaging.
Remember, safety should always be a top priority when using any power tools, including oscillating tools. While operating the device, wear appropriate safety gear, such as safety glasses and gloves.
Familiarize yourself with all the safety features your chosen oscillating tool provides, such as trigger locks or vibration reduction systems. By carefully considering these factors before starting your project, you can ensure that you have chosen the right oscillating tool and blade combination for cutting door hinges effectively and efficiently.
Safety Measures Before You Begin
Safety should always be a top priority When working with oscillating tools, particularly when cutting door hinges. By following a few essential safety measures, you can ensure a smooth and accident-free cutting process.
Firstly, always wear personal protective equipment (PPE) before operating your oscillating tool. This includes safety goggles to protect your eyes from flying debris, gloves to safeguard your hands from potential cuts or abrasions, and ear protection to minimize the tool’s noise.
Before starting any cutting task, ensure your oscillating tool is working well. Inspect the power cord for any fraying or damage, and ensure it’s plugged into a grounded outlet.
Examine the blade for wear or dullness and replace it if necessary. Remember that a sharp blade promotes clean and precise cuts while reducing kickback.
Additionally, before starting the hinge-cutting process, secure the workpiece properly. Affixing the door firmly prevents unnecessary movement that could lead to accidental slips or injuries.
Consider using clamps or an appropriate workbench setup to stabilize the door during cutting. Maintaining proper grip and control over the device is a crucial safety aspect when using an oscillating tool.
Ensure you fully grasp the tool and its handle before activating it. Maintaining balance throughout each cut is vital for accuracy while minimizing strain on your wrist and arm muscles.
Remember to familiarize yourself with all manufacturer instructions provided with your specific oscillating tool model, as they may include additional safety precautions explicitly tailored for that equipment. By adhering strictly to these safety measures, you can significantly reduce risks associated with oscillating tool hinge-cutting operations—keeping yourself safe while quickly achieving professional-quality results.
Marking and Measuring the Hinge Placement
When it comes to cutting door hinges with an oscillating tool, one of the crucial steps is marking and measuring the hinge placement accurately. This ensures a precise and seamless installation that aligns perfectly with your door frame.
You will need a pencil or marker, a tape measure, and a square or straight edge to achieve this. Before you begin marking the hinge placement, it is essential to consider safety measures.
Ensure you wear appropriate protective gear, such as safety glasses and gloves. Keep the work area clear of obstructions that may hinder movement or cause accidents.
Familiarize yourself with the specific safety guidelines provided by the manufacturer for your oscillating tool model. Start marking the hinge placement by positioning your door against a wall or a stable surface.
Measure and mark where the top hinge will be placed using a tape measure and pencil. It is recommended to place the top hinge approximately 7 inches from the top edge of the door, but this may vary depending on personal preference and specific requirements.
Next, measure and mark where the bottom hinge will be placed. Typically, it should be positioned around 11 inches from the bottom edge of the door.
Ensure both hinges are aligned vertically to create parallel lines when measured with a straight edge or square. After marking where each hinge will be placed on your door, marking corresponding spots on your door frame is essential.
By doing so, you ensure proper alignment between both elements during installation. Use a straight edge or square to accurately transfer these markings onto the frame.
Considering these precise measurements and markings ensures that once you start cutting using your oscillating tool, each hinge will fit perfectly into its designated spot without any misalignments or unnecessary adjustments later in the process. Remember, precision is vital when cutting door hinges with an oscillating tool – taking extra care during this stage will save you time and effort in the long run, resulting in a professional-looking door installation that enhances functionality and aesthetics.
The Cutting Process: Step-by-Step
Now that you have prepared all the necessary tools and safety measures, it’s time to delve into the step-by-step process of cutting door hinges with an oscillating tool. Follow these detailed instructions to ensure precision and efficiency:
1. Secure the Door: Secure the door using clamps or placing it on a stable work surface before cutting. This will prevent any unnecessary movement during the cutting process.
2. Prepare the Oscillating Tool: Attach a suitable blade for cutting door hinges to your oscillating tool. Opt for a blade designed for woodwork, ensuring optimal precision and durability.
Make sure that the blade is securely fastened before proceeding. 3. Marking and Measuring Hinge Placement: Measure and mark the desired hinge placement on the door and frame using a pencil or marking gauge.
Ensure accuracy by double-checking your measurements against reference points such as previous hinges or nearby surfaces. 4. Align the Blade with Markings: Align your oscillating tool’s blade with one of your marked hinge lines on either the door or frame.
Hold it at a slight angle to allow smooth entry into the material while minimizing vibration. 5. Begin Cutting with Precision: Slowly initiate the oscillating motion of your tool while applying gentle pressure against the marked hinge line.
Let the oscillations do most of the work, gradually guiding it through in a controlled manner without forcing or rushing. 6. Repeat on All Hinge Lines: Once you have completed one cut, move on to replicate this process on each marked hinge line, ensuring consistent depth and angling throughout for optimal results.
7. Fine-tuning with Chisel or File: After completing all necessary cuts, use a chisel or file to fine-tune any irregularities or excess material around each hinge recess if needed. This will ensure proper fitment when installing new hinges later.
Precision and patience are key when cutting door hinges with an oscillating tool. Take your time to achieve clean and accurate cuts, and always prioritize safety by wearing protective gear and following the manufacturer’s guidelines for your specific oscillating tool model.
Fine-Tuning the Hinge Placement
After you have completed the cutting process of the door hinges using an oscillating tool, it is essential to fine-tune their placement for a seamless installation. It involves making minor adjustments and ensuring that the hinges and the door frame perfectly align with each other.
This step is crucial to guarantee proper functionality and smooth operation of your door. To begin fine-tuning, examine the position of each cut hinge carefully.
Use a levelling tool to check if the hinges are aligned horizontally and vertically. If there is any discrepancy, you can make minor adjustments by widening or deepening the hinge recesses with your oscillating tool.
However, exercise caution during this step to maintain precision and avoid overcutting, as it may compromise your door’s structural integrity. Additionally, check for gaps between the hinge leaves and the recesses where they sit.
These gaps can affect how well your door closes and latches properly. To rectify this issue, you can use a chisel or a small file to remove excess material from either side of the recess until both leaves fit snugly without any gaps.
Another critical aspect of fine-tuning involves checking if all hinges are flush with both sides of the door when closed. Misalignment at this stage can cause friction or prevent smooth movement while opening or closing the door.
You can correct this by slightly adjusting the depth of one or more hinge recesses until they align perfectly. Remember that patience is vital when fine-tuning hinge placement; take your time to ensure accuracy throughout this process.
Paying attention to these details will create a solid foundation for flawless installation that will enhance both functionality and aesthetics in your home improvement project. In section 7/10, “Installation of Hinge”, we will discuss completing the final installation after fine-tuning.
Installation of the Hinge
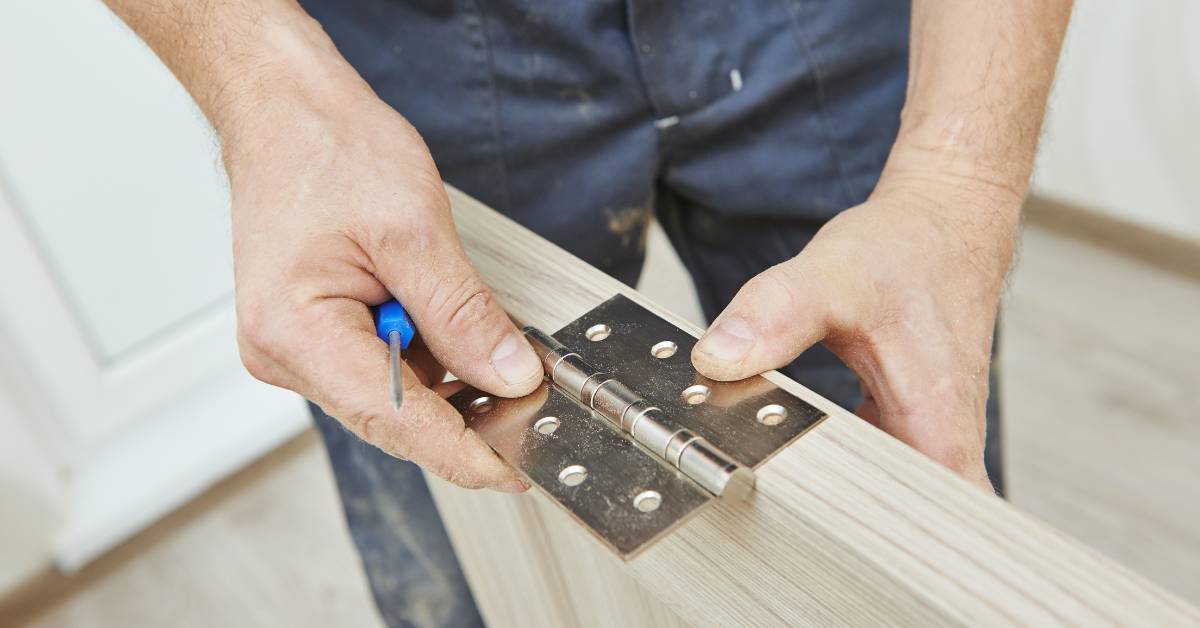
Once you have successfully made the precise cuts for your door hinges using an oscillating tool, it’s time to move on to the next crucial step – installing the hinge. This section will guide you through securely affixing the hinge to your door and frame, ensuring a seamless and functional installation. Before you begin, gather all the necessary tools and materials: your oscillating tool with the best blade for hinges, hinges, screws, a screwdriver or drill driver, measuring tape or ruler, and a pencil or marker.
It’s important to choose hinges that are suitable for your specific door thickness and weight. Opting for quality hinges not only ensures stability but also enhances longevity.
To start the installation process, place one piece of the hinge on the designated area of your door where you made the cuts. Ensure that it aligns perfectly with the markings made during measurement.
Use a pencil or marker to lightly trace around its edges onto the surface of both door sections involved in creating a mortise (the recessed area). This will serve as a helpful guide during hinge alignment.
Next, utilizing your oscillating tool outfitted with an appropriate blade for precision cutting on wood surfaces, carefully carve out shallow mortises according to your traced lines on both sections of the door as well as on its frame. Avoid cutting too deep or exceeding the desired depth; accuracy is paramount for flawless hinge fitting.
Once you have completed cutting out mortises using your oscillating tool accurately, test-fit each piece of the hinge into their respective slots on both sections of the door and frame. Verify that they fit snugly without any gaps or misalignment.
Make necessary adjustments if required by shaving off small amounts from either side until you achieve a perfect fit. After achieving optimal alignment between all pieces involved in creating each complete hinge assembly (including both sides of each section), secure them using screws provided with your chosen hinges.
Utilize a screwdriver or drill driver to drive the screws through the pre-drilled holes on each hinge plate, fastening them securely onto the door and frame. Taking your time and ensuring proper alignment during the installation of hinges is crucial for optimal functionality.
A well-aligned hinge will allow smooth door movement while preventing unnecessary friction or misalignment issues. Additionally, periodically check for any necessary adjustments in case of minor changes in alignment.
This will help maintain a well-functioning door system in the long run. With the hinge installation complete, you can now move on to further adjustments and fine-tuning if necessary before finalizing your door installation.
The final stages involve:
- Checking for proper closure.
- Ensuring smooth movement without any rubbing or sticking.
- Making any slight alterations if needed by adjusting the screws accordingly.
Remember that safety should always be prioritized when working with oscillating or power tools.
Familiarize yourself with oscillating tool safety tips to minimize accidents and ensure successful project completion. By following these step-by-step instructions for installing door hinges using an oscillating tool, you are well on your way to completing a professional-quality project that will elevate your doors’ function and aesthetic appeal.
Post-Installation Checks
After successfully installing door hinges using an oscillating tool, it is essential to conduct post-installation checks to ensure that everything is in order. These checks will ensure that the hinges are correctly aligned and guarantee the overall functionality and security of the door.
One crucial post-installation check is verifying the hinge plate alignment with the door and frame. Carefully examine the gaps between the door and frame when closed, ensuring they are consistent.
Uneven gaps may indicate a misalignment of one or more hinges. In such cases, use a spirit level to confirm if any adjustments are required for perfect alignment.
Door hinge adjustment techniques can be applied at this stage by loosening or tightening screws. Another critical aspect of post-installation checks is testing the door’s smooth operation.
Open and close it several times, paying attention to any resistance or sticking points along its swing path. Suppose there are any irregularities or friction while opening or closing. In that case, it may be necessary to make further adjustments to achieve optimal performance.
Additionally, inspecting for stability is essential in ensuring a secure installation. Firmly grasp both sides of the opened door and try gently rocking it back and forth.
An adequately installed hinge should hold firm without excessive movement or wobbling. If any instability is detected, double-check that all screws are tightened securely, as loose screws could compromise both safety and longevity.
By conducting thorough post-installation checks like these after cutting your door hinges with an oscillating tool, you can address any potential issues promptly, ensuring that your newly installed hinges function correctly and provide long-lasting stability for your doors. Remember always: Safety should be prioritized throughout this process; follow oscillating tool safety tips diligently while working on your DIY projects!
Cleaning Up and Maintaining Your Oscillating Tool
After successfully cutting door hinges with your trusty oscillating tool, it’s time to clean up and ensure the proper maintenance of this invaluable tool. Cleaning up after any project is crucial as it helps maintain the tool’s performance and prolongs its lifespan.
Additionally, regular maintenance ensures that your oscillating tool remains in excellent condition for future projects. Here are some essential tips on how to clean up and maintain your oscillating tool effectively.
Firstly, start by unplugging the oscillating tool to ensure safety during the cleaning process. Use a soft cloth or brush to remove any dust, debris, or wood shavings that may have accumulated on the exterior surfaces of the tool.
Pay particular attention to crevices and hard-to-reach areas where dirt tends to accumulate. Next, carefully detach any blade attachments from the oscillating tool and wipe them down with a damp cloth or brush.
Be sure to remove any sawdust or residue accumulated on the blades during use. If necessary, use a mild solvent or cleaning solution recommended by the manufacturer to dissolve stubborn stains or adhesives.
Once you have thoroughly cleaned all exterior surfaces and blade attachments, inspect your oscillating tool’s internal components for signs of wear or damage. Check for loose screws, worn-out gears, or any other issues affecting its performance.
If you notice any problems, consult your manufacturer’s guidebook for instructions on addressing them appropriately. Regular lubrication is critical to maintaining your oscillating tool’s performance in top condition over time.
Consult your manufacturer’s recommendations regarding lubrication points and intervals specific to your oscillating tool model. Apply a small amount of lubricant, such as oil or grease specified by the manufacturer, onto these points using a clean cloth or applicator provided with your toolkit.
Remember that proper maintenance not only extends the life of your oscillating tool but also ensures its optimal performance and safety. By following these cleaning and maintenance practices, you can be confident that your oscillating tool will be in excellent shape for future projects, allowing you to tackle DIY endeavors with ease and precision.
Conclusion
Mastering cutting door hinges with an oscillating tool opens up many possibilities for DIY enthusiasts and homeowners alike. With precision cutting capabilities, this versatile tool is an invaluable asset in any home improvement project.
Following the step-by-step guide in this article, you can confidently embark on your next-door installation or renovation endeavour. Throughout this guide, we have emphasized the importance of safety measures when using oscillating tools.
Always wear protective gear such as safety goggles and gloves to ensure your well-being during cutting. Additionally, carefully follow the manufacturer’s instructions and recommendations regarding blade selection and tool usage.
By accurately measuring and marking hinge placement, you can guarantee a seamless installation that aligns perfectly with your door frame. The detailed instructions in this article will empower you to achieve professional-level results without needing expensive contractor services.
After successfully cutting your door hinges, take the time to fine-tune their placement by adjusting them accordingly. This meticulous approach will guarantee optimal functionality and aesthetics once your door is installed.
It is crucial to maintain your oscillating tool properly to prolong its lifespan. Regularly clean debris from blades and inspect for any signs of wear or damage before each use.
By adhering to these maintenance practices, you can rely on your trusty oscillating tool for future projects. Armed with the knowledge gained from this guide, you are now equipped with all the necessary information and techniques for proficiently cutting door hinges using an oscillating tool.
Embrace creativity while staying safe by following our comprehensive tips and guidelines. With practice and patience, you will soon become an expert in precision hinge cutting – opening doors to endless possibilities for enhancing your home’s functionality and aesthetic appeal!


